
Converting a Citroen Relay (Ducato or Boxer) into a Motorhome – Fridge Comparison
Introduction:
Compressor fridge, 3 way fridge, thermoelectric cool box. There is a lot of choice when it comes to keeping food cold in a motorhome or boat!
The fridge is also one of the main energy draws in any motorhome or boat. I was keen for my Fridge to be operational permanently. Consequently, efficiency and adequate capacity was of paramount importance. I already owned an Electrolux 3-way fridge that was present in the donor caravan. The fridge was an absorption type, and whilst not the most efficient, it was in good condition. As a temporary solution, I decided to fit it into the kitchen unit as before. This could be used when connected to mains power or whilst driving. I did not connect the gas as I did not want to drill for the vent through the side of the van.
Thermoelectric coolers
My next task was to investigate the different fridge systems available. Most of the cheaper cool boxes and fridges are thermoelectric (Peltier) coolers. I discounted these due to their high energy consumption.
3-way / absorption fridges
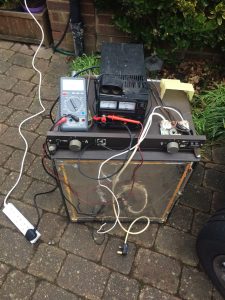
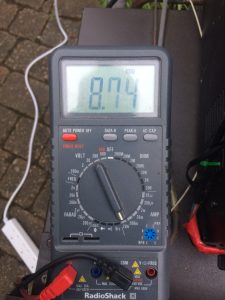
Next, I began investigating absorption fridges and decided to measure the power usage of my current Electrolux model. To achieve this, I connected the fridge to my desktop power supply set to exactly 12 volts. The fridge was rated at 100 watts which was confirmed by my test where it drew 8.74A. Clearly this was too much to be run by battery storage and I had to find a better solution.
Compressor Fridge
Mains or 12 Volt?
I researched conventional compressor fridges as found in homes and found these are considerably more efficient than thermoelectric or absorption models. Clearly this was the way to go! Now I was left with two options, either buy a 230v fridge and run through an inverter or buy a dedicated 12v fridge. Next, I looked at my inverter which despite being a good quality unit, I discovered that it used around 20watts under no-load conditions. This was a shame as there was an endless supply of free fridges on Gumtree!
All in one or split unit?
Finally I had to decide weather to buy an all-in-one unit, or a split unit with separate compressor. I decided that split was best as I could locate the compressor unit away from the fridge unit and vent it properly leading to greater efficiency.
Manufacturers
Various brands were available, with Waeco being the most well known brand for 12v fridges. Indeed, Waeco had a very comprehensive range. Unfortunately they were rather expensive and so I began looking at other brands such as Indel B, Vitrifigo, Engel, etc. Luckily, these brands had a similar specification with high quality compressors.
I began keeping an eye on Gumtree, Facebook and Ebay for 12v split unit compressor fridges and eventually found an Indel-B unit which I purchased. It was almost new, clean condition and included a quality Danfoss compressor.
Testing
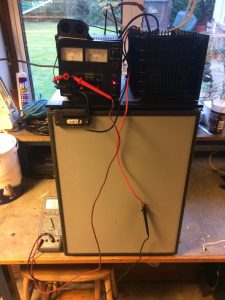
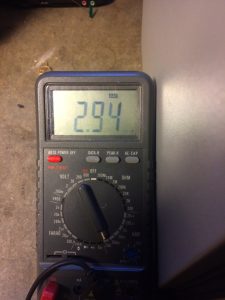
As before, I connected the fridge to my power supply and measured the power usage. As can be seen in the photographs, the result is a considerable reduction in power consumption. The Indel-B fridge uses just 35watts or around 1/3 of the absorption fridge. I removed the old fridge and after taking a few photographs, listed on Gumtree. I sold this to a man doing a van conversion who was really pleased as he was specifically looking for a gas fridge. It was a win-win situation for both parties!
Installing a split unit 12v compressor fridge:
Location
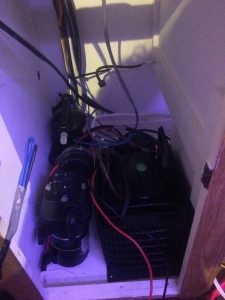
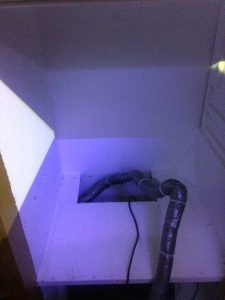
Now I had a working 12v compressor fridge, I began the installation. I had decided that the compressor was going to fit in an adjacent cupboard to the fridge. It is worth noting that the compressor is non detachable from the fridge unit and therefore a large access hole was required through the cupboard divider. I mounted the compressor in the adjacent cupboard next to my high pressure water pump.
Insulating pipes & fitting
The next stage was to insulate the connecting pipe (there is only one). I used standard 12mm pipe insulation and cut a 10mm wide strip along its length to ensure that it was a snug fit around the pipe. I then wrapped it in duct tape to reduced condensation before securing with a number of cable ties. It was necessary to bend the copper pipe to route it correctly , where I enlisted the help of my father to hold the connections to the compressor whilst I did this to avoid putting unnecessary strain on it.
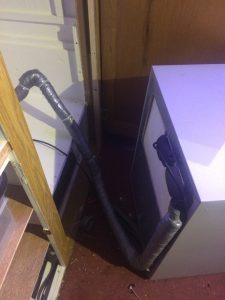
Once the pipe was routed correctly, I carefully lifted the fridge onto the shelf and secured into place with screws through the side and bottom of the cupboard.
Power
The final stage of the installation was to connect to the van’s power supply. Since I already had a suitable 2.5mm power supply for the old fridge, I simply connected the two spade connectors to the inlet on the compressor unit. It is worth noting that fridge compressors have a high startup current and so whilst the unit only draws around 3 Amps during operation, a much larger fuse is required in the distribution board – Consequently, I installed a 10A fuse which has not failed yet.
Finally I switched on the fridge, opened the door and filled it with a few beers!
For further information on my Motorhome conversion, please click here!
Website designed & maintained by Mark Richards Education.
Copyright. © 2020 Van and boat. All rights reserved.